
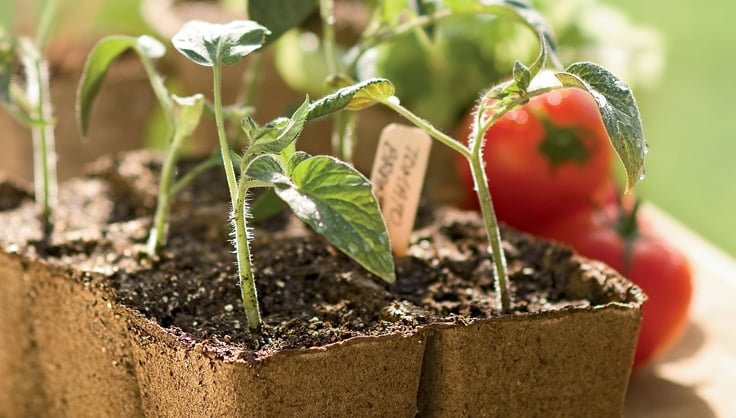
How to Grow Tomatoes from Seed

Last updated: March 19, 2025 | 4 min read
Everyone deserves to experience the difference when biting into a fragrant, vine-ripened, sun-warmed tomato harvested fresh from your own garden. Tomatoes are long-season, heat-loving plants that are easy to grow and can produce huge yields.
While you can purchase tomato transplants from almost any garden center, growing your own is incredibly rewarding. Plus, you can choose from among hundreds of tomato varieties that are available as seeds but rarely sold as transplants due to their inability to withstand commercial growing methods.
Quick to germinate and grow, tomato seeds are best sown indoors about six weeks before your average last frost date and transplanted out when the ground has warmed up in the spring. (To determine your last frost date, ask a gardening neighbor or call your Cooperative Extension office.) With a little patience and the right setup, you’ll be harvesting your own tomatoes in no time!
Here's what you'll need to start tomato seeds indoors:
- Tomato seeds
- Sterile potting soil for seed starting
- Containers
- A warm place with sufficient light
- Fertilizer
Step-By-Step Tomato Seed Starting
1. Pick the type of tomato you want to grow.
Do you prefer cherry tomatoes for salads, slicers for sandwiches, or are you interested in romas or san marzanos for sauce? Pick tomatoes you will want to eat! Consider the size of the mature plants and the space you have to grow in. "Determinate" tomatoes grow to about 3 feet tall and are the best choice for containers. "Indeterminate" tomatoes get very large, up to 6 feet tall. Look for disease-resistance. Tomatoes are very susceptible to diseases that can cause rot, blight, and wilting.
For more information on how to select varieties that are resistant to these and other common problems check out our advice article: How to Select the Right Tomato Variety.
2. Moisten your seed starting mix.
Always use a sterile, soilless mix to start seeds. It’s best to avoid garden soil, which often drains poorly and may harbor disease and unwanted pests.
3. Fill your containers to within 1/2" of the top (lightly press the mix but don't compact it).
While you can start your seeds in just about anything that holds soil and has drainage holes, most gardeners find it more convenient to use seed starting pots, such as or full seed starting systems, such as the GrowEase Seed Starter Kit. Setups like these help overcome early challenges like over- or under-watering that can affect tender seedlings as they get started.
4. Plant your seeds.
Place two or three seeds into each small container or each cell of a seed starter. Cover the seed with about 1/4" of soil and gently press it over the seeds.
5. Water.
Water to ensure good seed-to-mix contact. You can use a plant mister or just dribble a stream of water over the top. You don't need to soak the soil, just moisten the top layer.
6. Place the pots in a warm spot or on top of a heat mat to speed germination.
Seeds germinate best at around 70-75 degrees F, and then once they're established, seedlings grow best in cool room temperature, about 65 degrees F.
7. Keep the soil mix moist but not soaking wet.
If your seed-starting system has a humidity dome, use it to help hold moisture.
8. As soon as you see sprouts, remove the covering and place the pots in a very sunny window or under grow lights.
Keep the lights just an inch or two above the tops of the plants. Tomatoes and other fruiting vegetables need a lot of light. To grow hearty tomato transplants, you’ll need at least 6 hours of direct sunlight. Insufficient light can lead to weak, spindly plants. A light garden with adjustable fluorescent lights is ideal for seed starting.
9. Continue to keep the soil consistently moist but not saturated.
Overly cool, wet conditions can lead to damping off which is due to a common fungus. Some gardeners put up a fan to help provide better air circulation and prevent that. If you're growing plants on a windowsill, rotate pots daily so plants grow upright instead of leaning toward the light. If you're growing under lights, raise the lights as the plants grow, keeping them just a few inches above the plants.
10. Thin your seedings.
The hardest part emotionally of seed starting is thinning your seedlings. You’ve done all this work to get them here, but it has to be done. For the strongest, healthiest plants you'll want just one seedling per pot or cell. Select the strongest, healthiest seedling, and use a pair of scissors to snip the others off at the soil line.
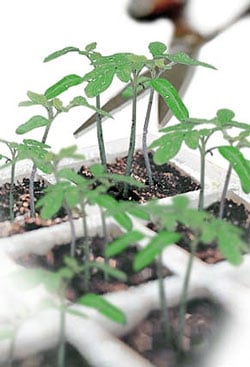
Use scissors to thin out crowded seedlings.
11. Fertilize.
Tomatoes are heavy feeders. The first set of 2 leaves are called “seed leaves” and subsequent leaves are called “true leaves.” Once the second set of true leaves appears, fertilize your seedlings with a soluble fertilizer diluted at half the recommended rate. Apply once a week until it’s time to transplant into the garden.
12. Repot.
If your tomatoes are outgrowing their homes, they may need to be transplanted into larger containers before going into the garden. Tomatoes won’t tolerate frost, so it’s recommended to not move them out until it’s warm in the spring.
For step-by-step instructions on repotting read: How to Repot Tomato Seedlings.
13. Transplant.
Wait to transplant your tomato seedlings into the garden until after the average last spring frost date. It’s important to harden off your seedlings before fully transplanting them outside to avoid freezing, sunburn, and other damage that can happen to your plants from drastic changes in environment.
Be ready with a plant protector or row cover if a late frost threatens your hard work.
Consistently water and fertilize your tomatoes and if all goes well, you’ll be harvesting in eight weeks or less! For more tips on how to grow tomatoes once you’ve transplanted them outside: Six Ways to Make Your Tomatoes Grow Faster.
Print this Article:
Get the Dirt
Stay up to date on new articles and advice. Please fill out the information below.