Recipes for Pickles, Sauerkraut and Kimchi
Preserve Your Garden Harvest
Making Sauerkraut
Rinse the cabbages under cool water and remove the damaged outer layer of leaves from each head; reserve four leaves that are free of bruising or damage.
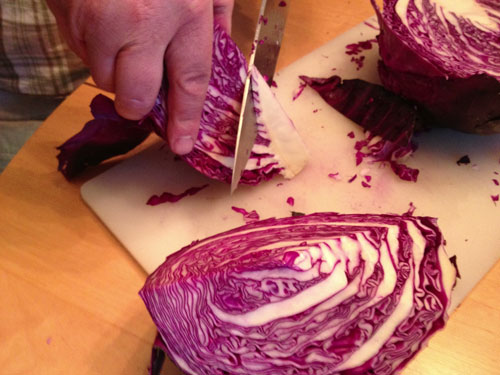
Cut each head into quarters and cut out the woody core, leaving enough of it to keep the cabbage from falling apart.
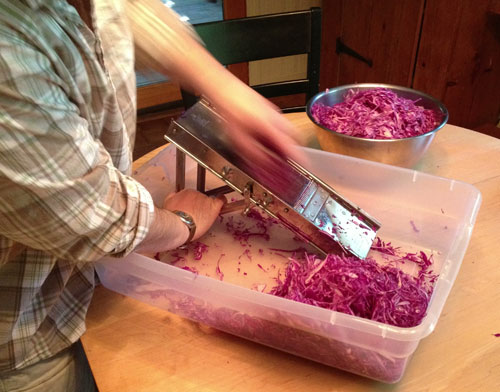
Using a mandoline or a sharp, large knife, work over a large rectangular container and slice the cabbage along the cut face into fine shreds, about the thickness of a quarter dollar.
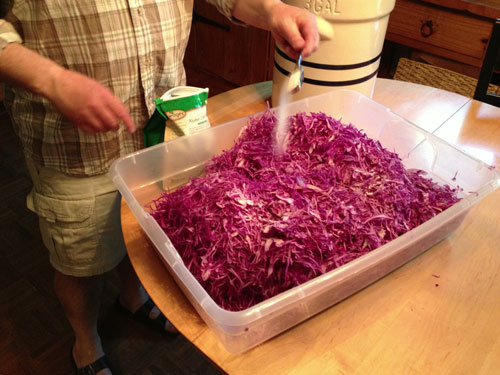
Sprinkle the shredded cabbage with the salt and caraway seeds.
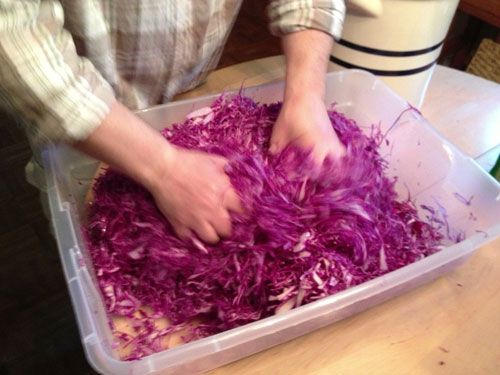
Massage the cabbage mixture vigorously with both hands, using your fingers to squeeze and bruise the cabbage, releasing as much of its liquid as possible. This should take about 10 minutes.
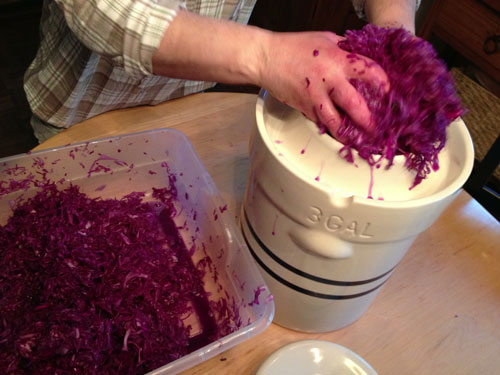
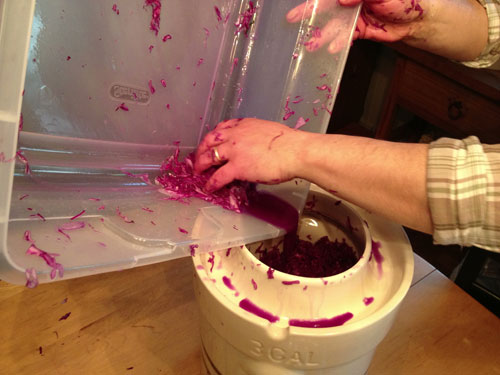
Transfer the cabbage mixture, being sure to get all of the liquid, to a 3-gallon pickling crock or fermenting crock. Using a potato masher, a wooden spoon or your fist, pack the cabbage mixture into the bottom of the crock to remove any pockets of air.
At this point, the cabbage mixture should be completely covered in the brine. If not, dissolve 1 tablespoon of pickling salt in a quart of cold water and pour it over the cabbage mixture to submerge.
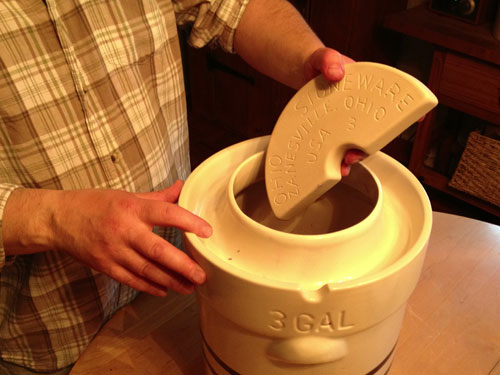
Place the reserved leaves on top of the cabbage mixture and top with weights so all the ingredients are completely submerged in the brine.
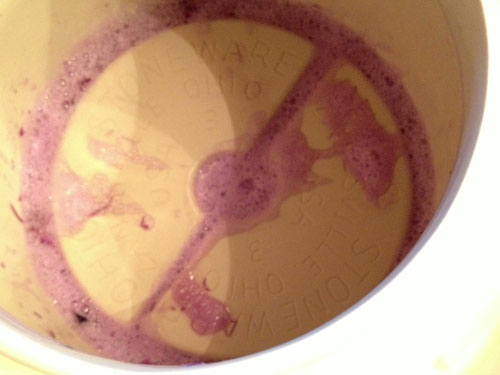
Frothy brine rises to the level of the weights
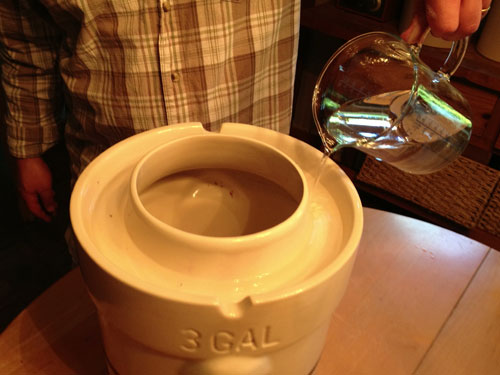
Filling the trough on the rim of the crock with water will create an airlock that will let carbon dioxide escape while keeping stray molds and bacteria out.
Ruby Red Caraway Sauerkraut
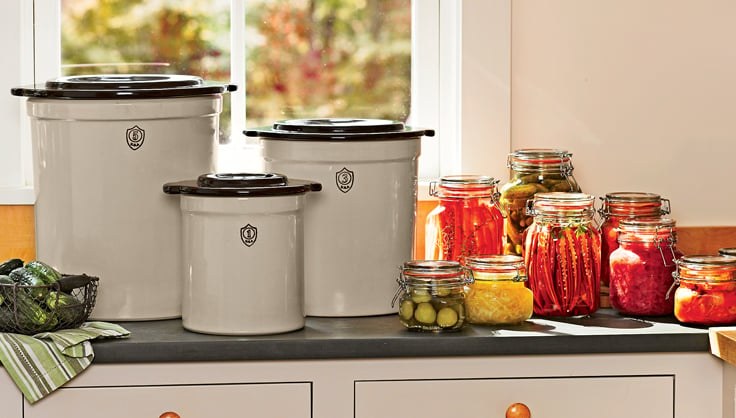
Yield: 6 to 7 quarts Equipment: Sharp kitchen knife or mandolin Large, rectangular plastic storage container (34-quart, roughly 26 x 16 x 6) A 3-gallon fermenting crock with weights
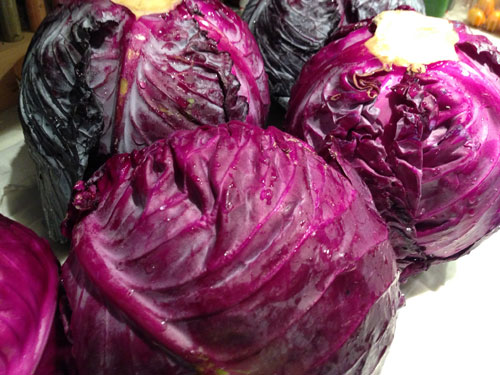
- 15 pounds red cabbage
- 9 tablespoons pickling salt, available in most supermarkets
- 2 tablespoons caraway seeds
Rinse the cabbages under cool water and remove the outer layer of leaves from each head and reserve four leaves that are free of bruising or damage. Compost or discard the remaining outer leaves.
Cut each head into quarters and cut out most of the woody core, leaving just enough of it to keep the cabbage from falling apart. Using a mandolin or a sharp knife, slice the cabbage along the cut face into fine shreds. The goal is to get it about the thickness of a quarter (25¢). Collect the shreds in the plastic storage container.
Sprinkle the shredded cabbage with the pickling salt and caraway seeds. Using both hands, massage the cabbage mixture vigorously, using your fingers to squeeze and bruise the cabbage, releasing as much of its liquid as possible, about 10 minutes.
Transfer the cabbage mixture and the brine (the liquid generated by massaging) to a 3-gallon fermenting crock (or a 3-gallon pickling crock). Using a potato masher, a wooden spoon or your fist, pack the mixture into the bottom of the crock to remove air pockets. The mixture should be completely covered in liquid. If not, dissolve 1 tablespoon of pickling salt in a quart of spring water and pour it over the cabbage mixture, as needed.
Place the reserved leaves on top of the cabbage mixture and top with weights so all the ingredients are submerged in the brine. Cover the crock and place it where the temperature remains 60 to 70 degrees throughout the day. The cooler the temperature, the longer the fermentation will take.
Check the sauerkraut every few days. If any scum or mold develops on the surface of the brine, skim it and also rinse the weights. Using a damp paper towel, wipe any specks of mold off the walls of the crock.
As the cabbage ferments, small bubbles will rise to the surface. You can begin tasting the sauerkraut after about a week. When the bubbling stops and the sauerkraut has developed a strong, slightly yeasty tang — usually after about two weeks — fermentation is complete. Using your taste as a guide, you can let the sauerkraut continue to ferment for up to six weeks.
The finished sauerkraut should be packed in 1-quart glass jars to store in the refrigerator. Be sure that each jar has enough brine to cover the contents. The sauerkraut will keep for at least six weeks in the refrigerator. For longer storage, it can be canned or frozen.
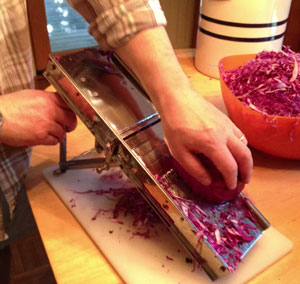
Using a mandoline.
- The choice of red cabbage for this recipe is purely aesthetic, but the results are gorgeous. Green cabbage will result in a kraut that is just as tasty.
- The hardest part of making sauerkraut is getting a consistent shred. I used a mandoline (a slicer that can be purchased a most kitchen stores), but caution you to watch your knuckles if you use one.
- Using a large rectangular container to collect the shredded cabbage and then mix and massage the ingredients really makes the process easier and a lot less messy. You can find a bin at a homewares store; before using, wash the bin thoroughly.
- You're going to find it hard to believe that just by massaging the cabbage and salt you are going to end up with enough brine to cover the sauerkraut. Be patient and really pack the ingredients firmly into the crock and you shouldn't have to add any extra brine.
- Finally, making great sauerkraut is about diligence and patience. Check the crock often for scum and mold and skim when necessary. And by all means, taste as often as you like. You'll be amazed at how the flavor changes over time and it really is the only way to decide when it tastes just right for you.
Making Pickles
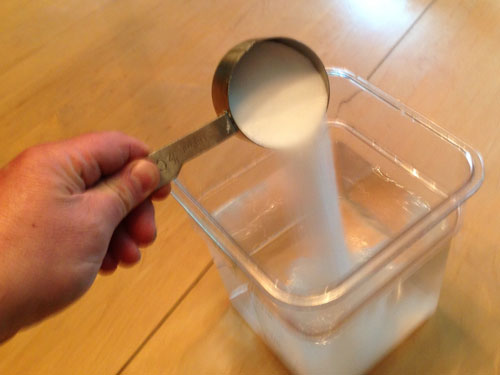
Dissolve pickling salt in bottled spring water.
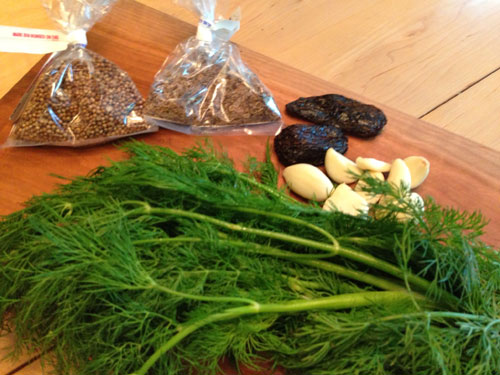
Fresh herbs, spices and garlic will be the flavoring ingredients for these pickles.
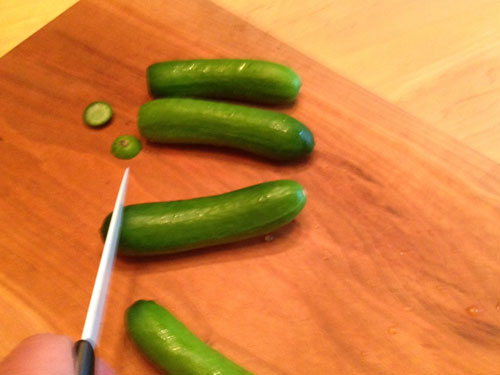
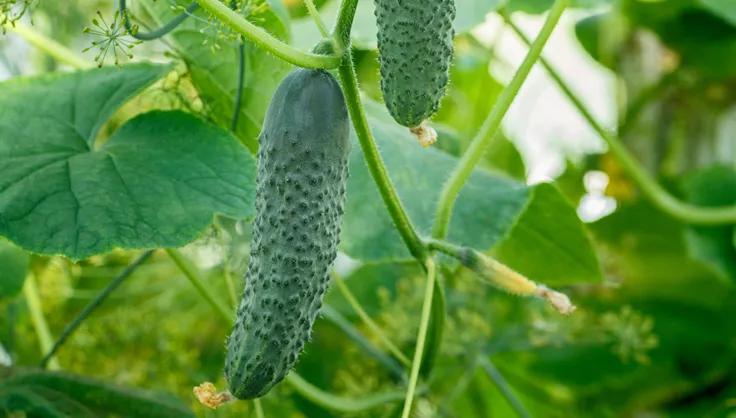
Cut off the blossom ends of the cucumbers so that the enzymes in the flowers don't affect the fermenting process.
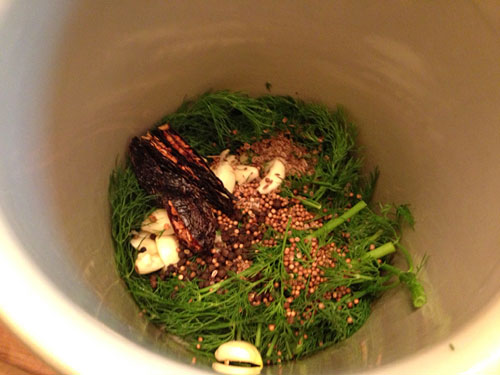
Place half of the flavoring ingredients at the bottom of the crock.
Place the cucumbers on top of the flavoring ingredients in the crock and cover with the remaining flavoring ingredients.
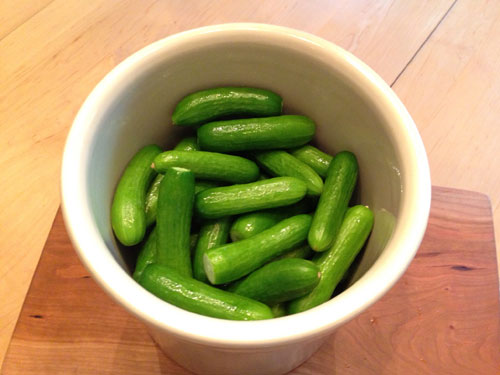
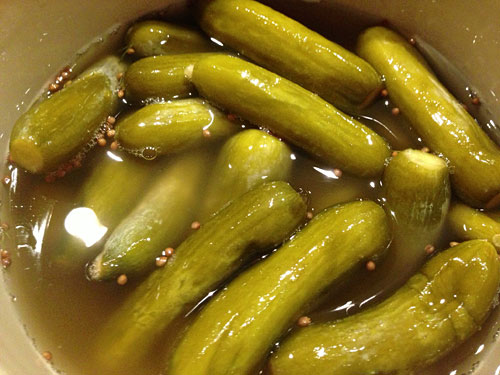
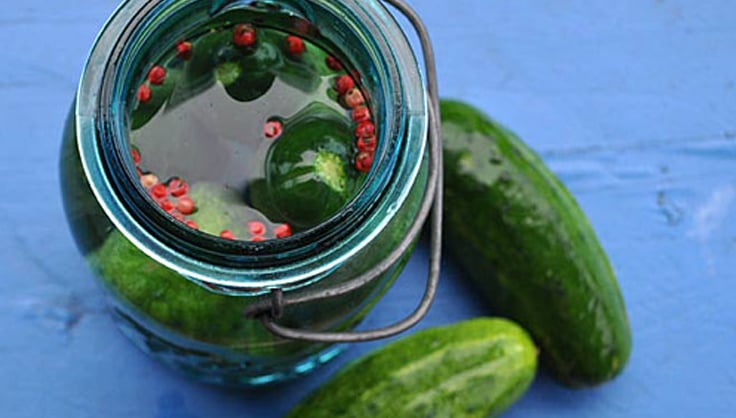
Add the brine to the crock leaving 1 to 2 inches of space at the top.

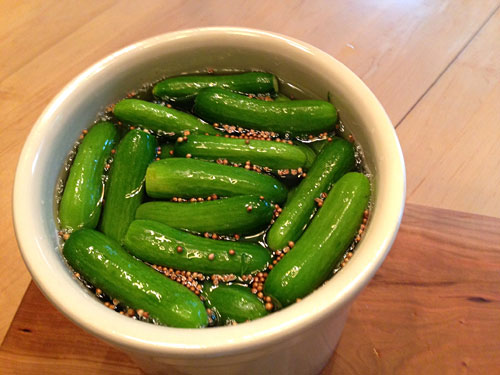
Place the weights on top of the cucumbers.
Fully-fermented pickles
Smoky-Sour Dill Pickles
Yield: About 4 quarts Equipment: A 1-gallon pickling crock with weights
- 1/2 cup pickling salt
- 1 gallon spring water, plus additional for canning
- 3 pounds pickling cucumbers, blossom ends removed
- 1 tablespoon black peppercorns
- 3 dried chipotle peppers, split in half
- 1 tablespoon coriander seeds
- 1 large bunch fresh dill
- 1 tablespoon dill seeds
- 8 garlic cloves, crushed
Make the brine: In a large bowl, dissolve the salt in the water.
Pick through the cucumbers and discard any that are bruised or have soft spots. Rinse well under cold water.
In a small bowl, combine peppercorns, peppers, coriander, fresh dill, dill seeds and garlic
Place half of the herb/spice/garlic mixture at the bottom of the crock. And the cucumbers and top with the remaining mixture. Pour the brine over the cucumbers and place the weights on top so that all the ingredients are submerged under an inch or two of brine.
Cover the crock and place in a spot where the temperature remains 60 to 70 degrees. The cooler the temperature, the longer the fermentation will take.
Check the crock daily and skim any scum or specks of mold from the surface of the brine. Wipe any specks of mold off the walls of the crock with a damp paper towel.
Taste pickles after a week. At this point it's a matter of taste and you can let the pickles continue to ferment for up to three weeks in the crock, until they have reached the desired tanginess. Half-sour pickles take seven to 10 days to ferment while full sours can take up to three weeks, depending upon the temperature.
Transfer the pickles to clean 1-quart jars and fill halfway with brine (and pickling ingredients if desired). Fill the jars to the top with bottled spring water, making sure each jar has enough to completely cover the contents. The pickles will keep in the refrigerator for at least three weeks, but can be canned for longer storage.
- Pickling cukes aren't that hard to find in markets (if you haven't grown your own), but be sure to sort through them carefully. Bruised or soft cucumbers break down more quickly during fermentation, and can ruin the rest of your pickles.
- Be sure to remove any remnants of dried blossoms. The flowers contain an enzyme that inhibits fermentation.
- I call for bottled spring water in this recipe because tap water often contains chlorine or other anti-bacterial agents that interfere with the growth of the good bacteria that will make the pickles ferment and sour. If your water comes from a well, you should be fine.
Making Kimchi
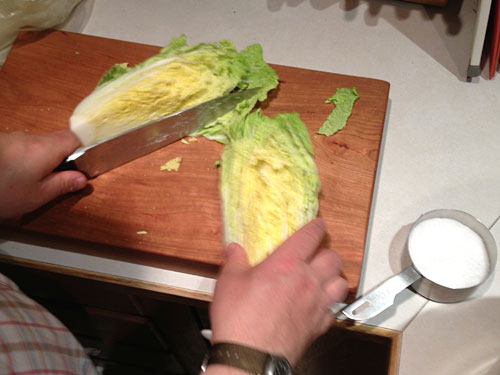
Cut the heads of cabbage in half and remove the tough woody core.
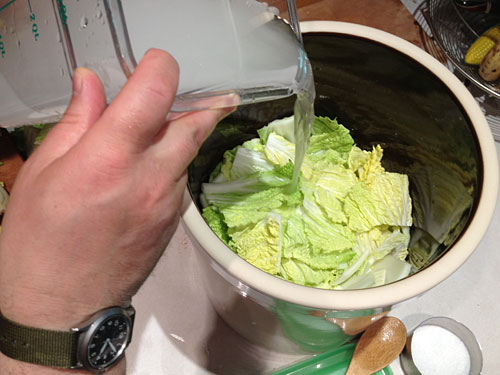
Brine the cabbage in saltwater overnight in either a large bowl or the crock.

Korean hot pepper paste is available at Asian markets and many larger supermarkets in the international section.
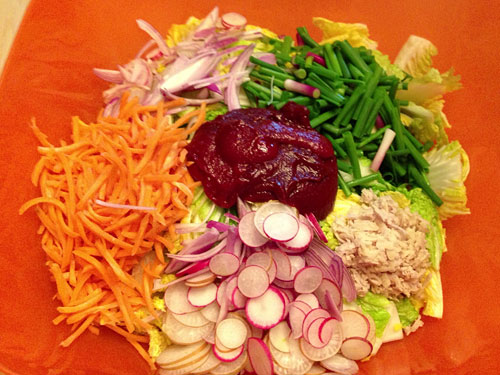
Prepared ingredients for Napa Cabbage & Ginger Kimchi
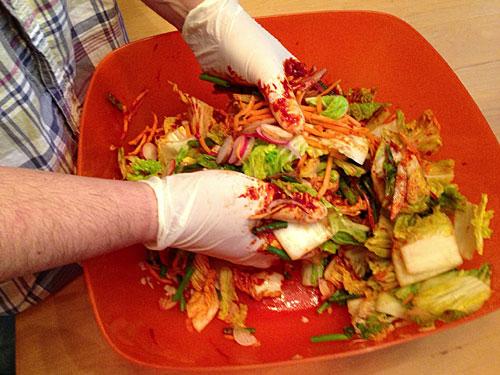
Massage the cabbage mixture vigorously with both hands, using your fingers to squeeze and bruise the cabbage mixture, releasing as much of the vegetable's liquid as possible. This takes about 5 minutes. Wearing rubbing gloves will protect your hands from the hot pepper paste.
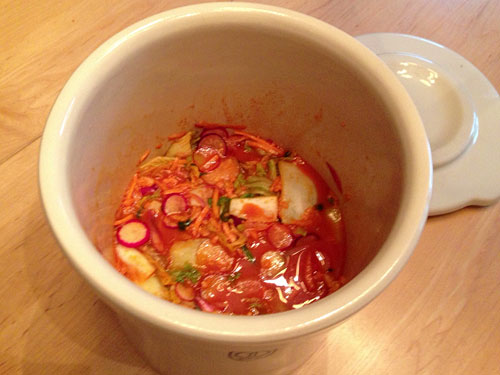
Transfer the cabbage mixture — being sure to get all of the liquid — to a 1-gallon pickling crock or fermenting crock. Using a potato masher, a wooden spoon or your fist, pack the cabbage mixture into the bottom of the crock to remove any pockets of air. At this point the cabbage mixture should be completely covered in the brine.
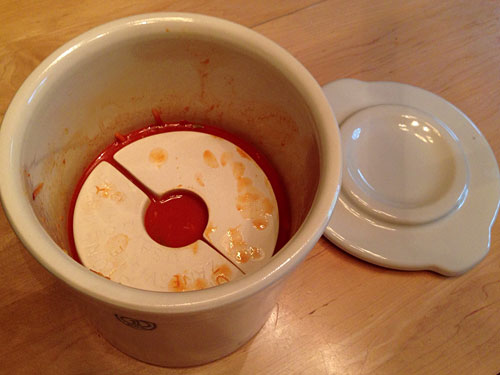
Place the weights on top of the mixture so all the ingredients are completely submerged in the brine.
Napa Cabbage & Ginger Kimchi
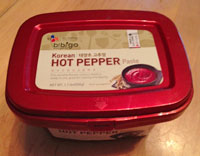 Korean hot pepper paste
Yield: About 2 quarts Equipment: A 1-gallon pickling crock (or fermenting crock) with weights
- 4 pounds Napa cabbage
- 3/4 cup kosher salt
- 1 gallon spring water
- 2 cups grated carrots
- 6 garlic cloves, peeled and split lengthwise
- 3 tablespoons grated fresh ginger
- 2 bunches green onions, ends trimmed and sliced into 2-inch pieces
- 1 bunch radishes, tops removed and thinly sliced
- 2 medium shallots, sliced crosswise
- 1/2 cup Korean red pepper paste
Cut the heads of cabbage in half and remove the woody core. Cut cabbage into 2-inch chunks.
In a large bowl, dissolve the salt in the water. Place the cabbage in the salted water, cover with a clean dishtowel and let sit overnight at room temperature.
Using a large colander, drain the cabbage. Rinse with fresh water and then let drain for 10 minutes.
In a large bowl, combine the cabbage, carrots, garlic, ginger, green onions, radishes, shallots and red pepper paste. Using both hands, massage the cabbage mixture vigorously, using your fingers to squeeze and bruise the cabbage mixture, releasing as much of the vegetable's liquid as possible, about 5 minutes. You might want to wear rubber gloves.
Transfer the cabbage mixture — being sure to get all of the brine (the liquid generated by massaging) — to a 1-gallon pickling crock or fermenting crock. Using a potato masher, a wooden spoon or your fist, pack the cabbage mixture into the bottom of the crock to remove any pockets of air. The cabbage mixture should be completely covered in the brine.
Place the weights on the mixture to keep the ingredients submerged in the brine. Cover the crock and place in a spot where the temperature remains 60 to 70 degrees. The cooler the temperature, the longer the fermentation will take.
Check the kimchi every few days. If any scum or mold develops on the surface of the brine, skim it and also rinse the weights. Wipe any specks of mold off the walls of the crock with a damp paper towel.
As the kimchi ferments, small bubbles will rise to the surface. You can begin tasting the kimchi after two or three days. Using your taste as a guide, you can let the kimchi continue to ferment one to three weeks longer.
The finished kimchi should be packed into 1-quart glass jars and stored in the refrigerator. Be sure that each jar has enough brine to cover the contents. The kimchi will keep for at least six weeks in the refrigerator, For longer storage it can be canned or frozen.
- While the ingredients I've chosen for this recipe create a delicious kimchi, feel free to add any vegetables you like — perhaps even some fruit, such as slices of apple or pear.
- Korean red pepper paste is available in the Asian section of many well-stocked supermarkets, but you can also find it at Asian specialty markets.
- Many Korean kimchi recipes include fish sauce (also available in the Asian section of most well-stocked supermarkets), but I decided to make this a vegetarian version. Fish sauce adds a delicious, slightly funky, savory flavor to the mix. If you like, add about a tablespoon to the mixture before it goes in the crock.
- Fermenting kimchi has a heady aroma — more powerful than sauerkraut and pickles. I enjoyed it, but it permeated our cellar, where I placed the crock.
Last updated: 01/04/2023
Print this Article:
Related Articles
Get the Dirt
Stay up to date on new articles and advice. Please fill out the information below.